Using the Widget to Authorize an Account
This walkthrough provides a tutorial on how to generate a user authorization code with the widget.
Overview#
Rather than custom-building a user access flow, the Arrive Widget provides a convenient way for users to explicitly grant a partner access to their ParkWhiz account.
Enabling the Widget#
To enable the Oauth widget, either include it as a WebView in your mobile application or page redirect in your website with the following options in the URL path:
| Parameter | Value | Function |
|---|---|---|
ui-components | oauth | Displays the Oauth component |
client-id | Arrive-issued ID | Identifies the partner looking for access, and displays it in the widget |
redirect-uri | URL | The URL redirected to after completion of login and access grant |
Setting the Redirect URI
For security reasons, the redirect-uri must match with what is stored in Arrive's internal partner record. Please coordinate with your Support Representative prior to updating the redirect-uri.
Depending on your integration, you should add the following optional parameters:
| Parameter | Value | Function |
|---|---|---|
oauth-components | vehicle and/or payment | Requires the user to enter vehicle license plate and/or payment information if they do not have any defaults saved on their account |
entry-point | sign-in | Starts the widget on the Sign In rather than the Sign Up page |
state | Partner-defined | If in a web integration, use this parameter to track requests |
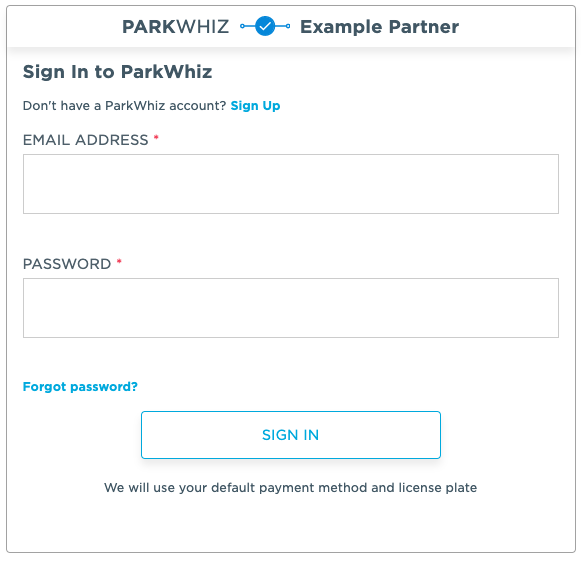
If the widget is enabled properly, you should see a view similar to the following image:
Example Oauth Widget

Retrieving the User Authorization Code#
Upon a user authenticating and explicitly granting permission to the application, they will be automatically redirected to the predefined redirect-uri along with a temporary authorization code (valid for 30 minutes) under the code query parameter. This code can then be used in the standard Authorization Token Grant Flow.
Passing the Access Token into the Widget#
The generated access token is applicable not only via the API. Additionally, you can use the access token to authenticate the user within the widget.
Using the access-token option, you can pass the access token back into the widget for a seamless login experience.